Photoshop绘制逼真的苹果MP3播放器
本教程主要使用Photoshop绘制逼真的苹果MP3,黑白交接的质感非常的漂亮,本教程为翻译教程,有不懂的地方可以对照英文查看.
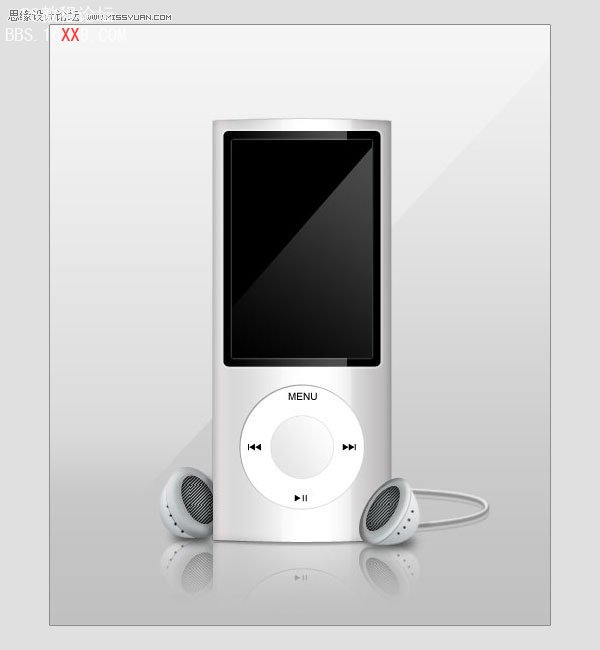
Final Image Preview最终图片预览
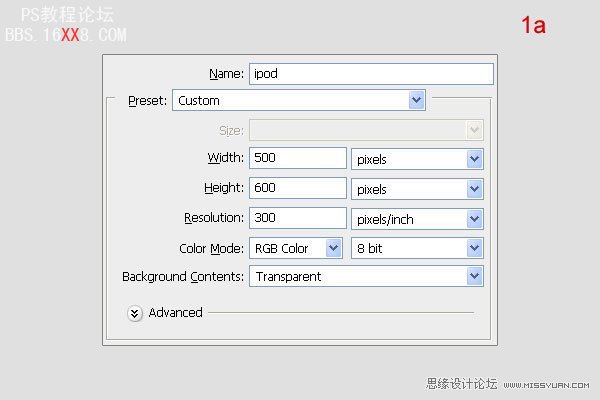
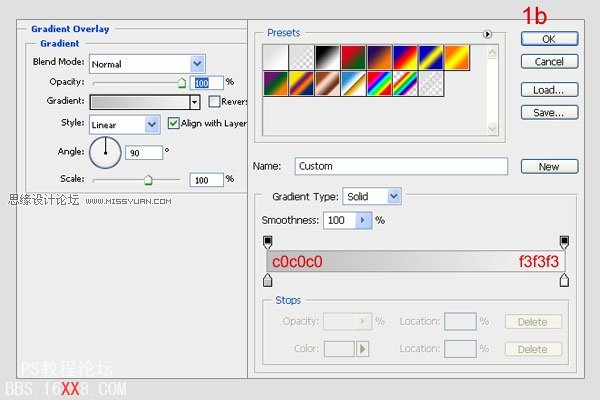
Step 1Create a new document with these settings like 1a. The first layer, call it “background” and fill any color. Then Open the Blending Options and settings (1b).
步骤1
创建一个新文档,参见图1a。第一层命名“background” 可以填充任何颜色。给他添加图层样式,渐变叠加,设置参见b1
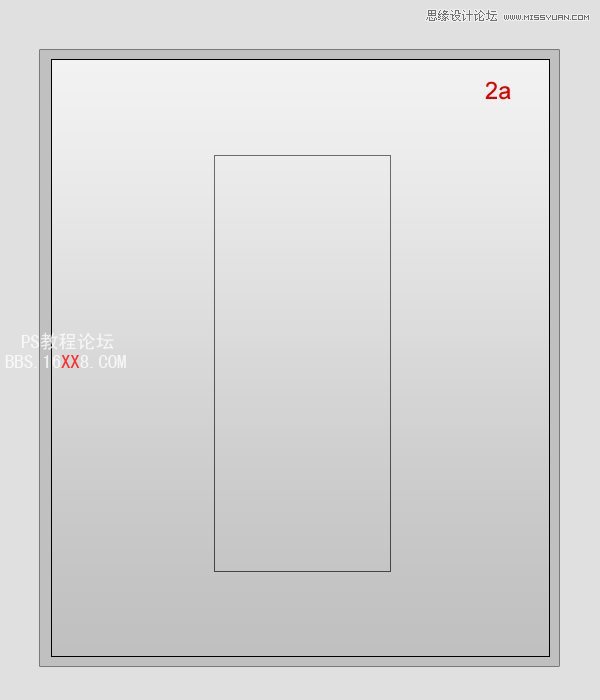
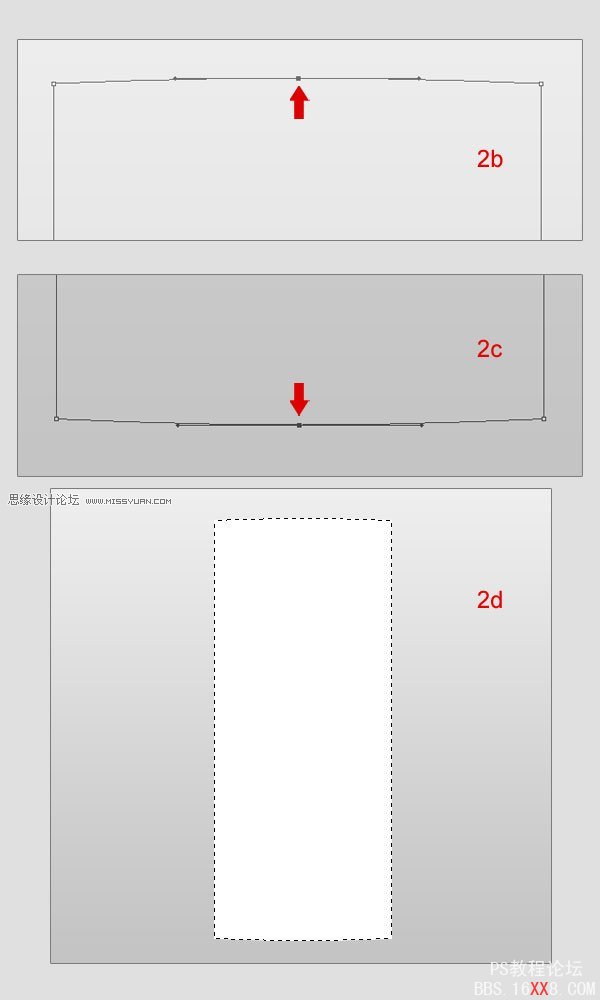
Step 2Create a new folder, call it “ipod”. In this folder, create a new layer, call it “ipod” as well. Select the Rectangle Tool (U) to draw a rectangle shape like the one below (2a). Select the Pen Tool and click on the shape. After that, create four nodes of the shape as shown. At the top line, click to make a node between two top nodes. Then correct the top line of the curve by holding “Command” down, and clicking and dragging the node upward by a little (2b). Do the same with bottom line, but downward this time(2c). Then press Command + Enter to make the selection and fill that with color (2d).
步骤2
创建一个新的文件夹,吧它命名为“ipod”,在这个文件夹里面创建一个新层,命名为“ipod”。使用矩形工具(U)创建一个图2a所示形状。选择钢笔工具在形状添加锚点,如下所示。然后按下Ctrl + Enter建立选区,并填充颜色,参见(2d)
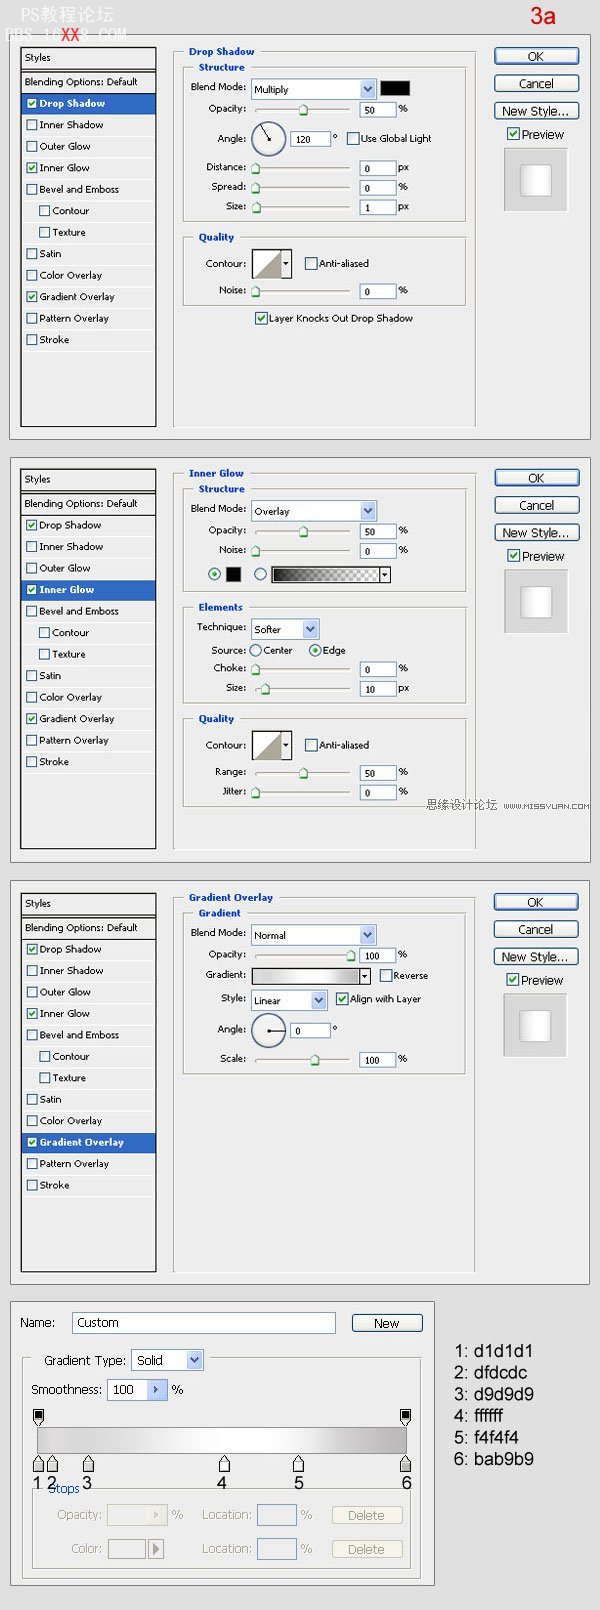
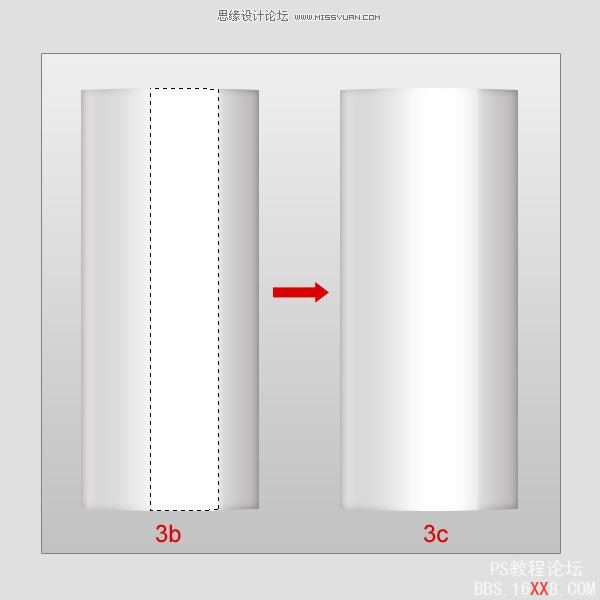
Step 3Open the Blending Options menu for “ipod” and adjust the settings like in image 3a. Create a new layer on top, call it “light ipod”. Use the Rectangular Marquee Tool (M) to make a rectangle selection and fill it with white (3b). Then reduce the Opacity to 30% (3c).
步骤3
给“iPod”添加图层样式,参见图3a的设置。在“iPod”上面创建一个新层,命名为“light ipod”。使用矩形选框工具(m)建立选区如图(3b)并填充白色。然后,将不透明度设置为30%(3c)。
Step 4Create a new layer on top, call it “screen bg”. Use Round Rectangle (set Radius: 5px) to draw a shape like one below and fill it black color (4a). Then open Blending Option and setting (4b).
步骤4
创建一个新的层命名为 “screen bg”。使用圆角矩形工具(u)(半径:5px)创建一个参见图(4A)的形状并用黑色填充。然后双击图层,添加图层样式,设置参见图(4b)。


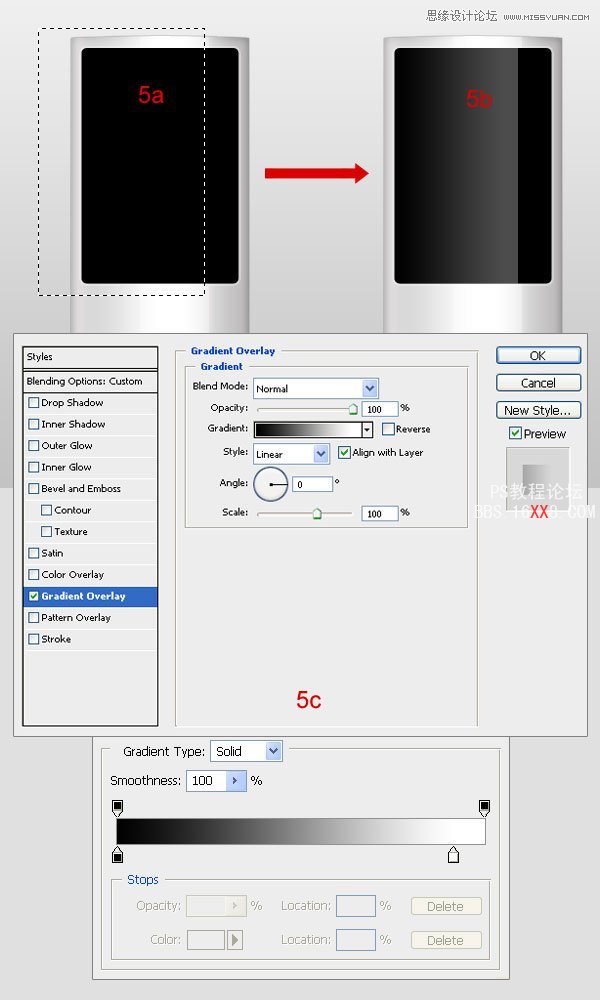
Step 5Use the Rectangular Marquee Tool to make the selection (5a). Press Command + J to duplicate this selection, rename the new layer “screen bg light”. Reduce the Opacity to 30% (5b). Then open the Blending Options and use the following settings (5c).
步骤5
使用矩形选框工具(m)创建如图(5a)的选区。按Ctrl+ J复制图层,将新层命名为“screen bg light”.不透明度设置为30%(5b)。然后双击打开图层样式,参见(5c)设置。
Step 6Create a new layer on top, and call it “screen”. Use the same tool to make the rectangle selection right in the middle of the “screen bg” and fill it with black (6a). Then open Blending Options and use these settings (6b).
步骤6
创建一个新层,命名为“screen”。使用相同的工具,使在“screen bg” 与 “screen”垂直居中,并填充黑色(6a)。然后双击图层,添加添加图层样式,参见图(6b)设置。

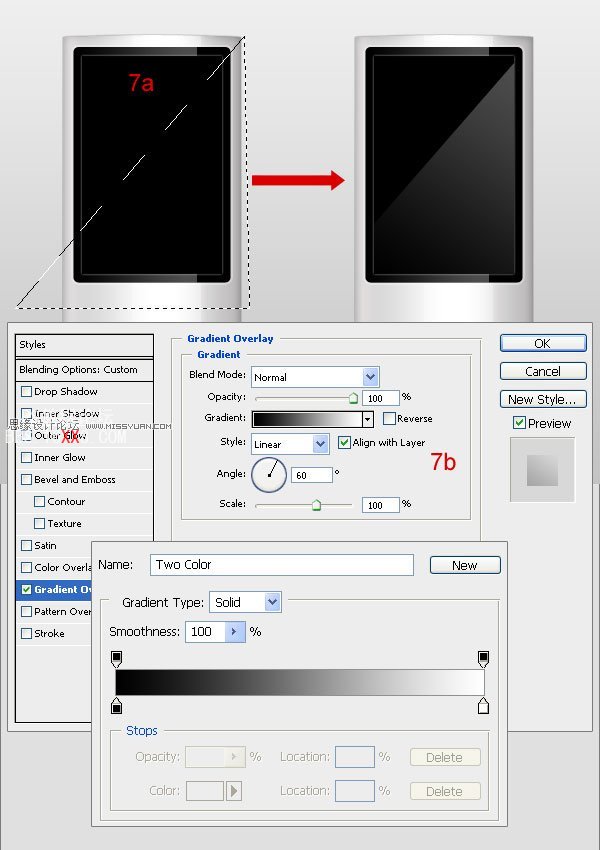
Step 7Use the Polygon Lasso Tool to make the selection like in 7a. Press Command + J to duplicate this selection, rename the new layer “light screen”. Open Blending Options and use the specified settings (7b). Then reduce the Opacity to 30%.
步骤7
使用多边形套索工具(L),参照7a建立选区。按Ctrl + J复制图层,重命名新的层为“light screen”。然后双击图层,添加添加图层样式,参见图(7b)设置。不透明度设置为30%。
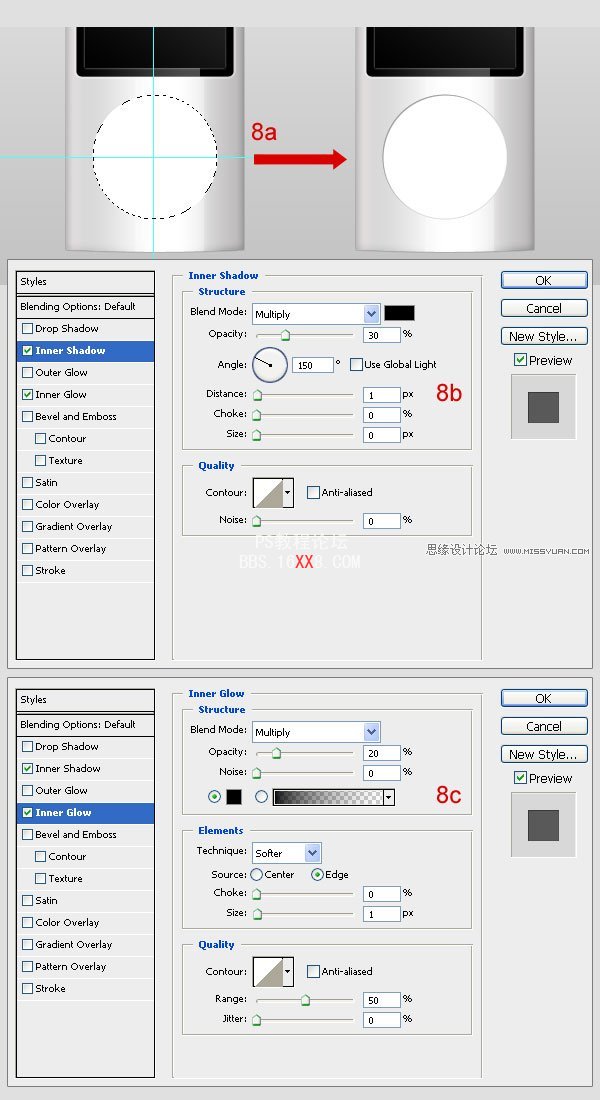
Step 8Create a new layer on top, call it “button bg”. Use Elliptical Marquee Tool to make the circle selection and fill it with white (8a). Then open Blending Options and use these settings (8b, 8c).
步骤8
创建一个新层,命名为 “button bg”。使用椭圆选框工具(m),参加8a建立选区,并用白色填充。然后双击图层,添加添加图层样式,参见图(8b,8c)设置。
Step 9Create a new layer over “button bg”, and call it “circle”. Use the same tool to make the smaller circle selection and fill it with white (9a). Then open Blending Options and copy these settings (9b, 9c). Add a button icon on “button bg” (9d).
步骤9
创建一个新层,命名为“circle”。使用同样的方法,也用白色填充,参见9a。然后双击图层,添加图层样式,设置参见图(9b,9c),在“button bg” 层上面添加一些按钮,参见9d


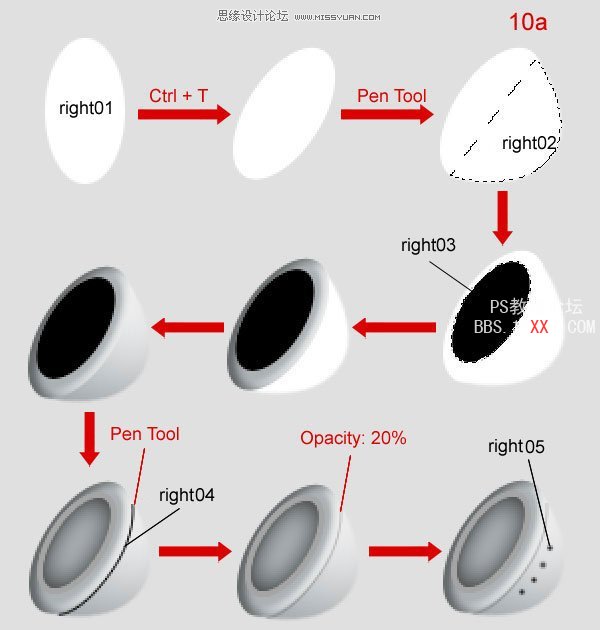
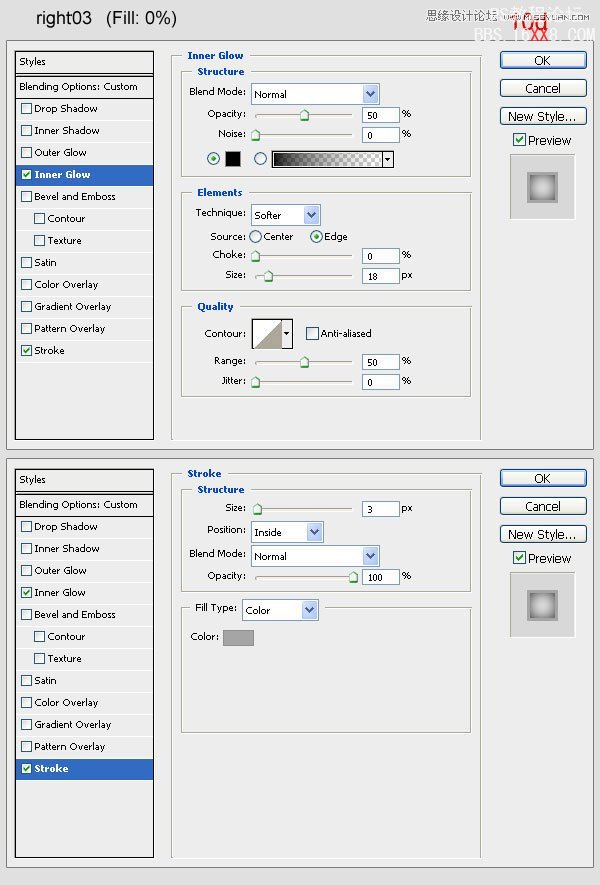
Step 10The right earphone is up next.
Create a new folder (outside “ipod” folder), call it “right earpiece”. Use the Elliptical Marquee Tool and the Pen Tool (P) to draw like in the steps below (10a). In turn, open the Blending Options of each layer and use these settings (10b, 10c, 10d).
步骤10
接下来绘制耳机
在“iPod”文件夹的外面创建一个新文件夹,命名为“right earpiece”。使用椭圆选框工具(m)和钢笔工具(P)按照(10a)的步骤来绘制。接下来,给你一层添加图层样式,参照(10b,10c,10d)的设置。


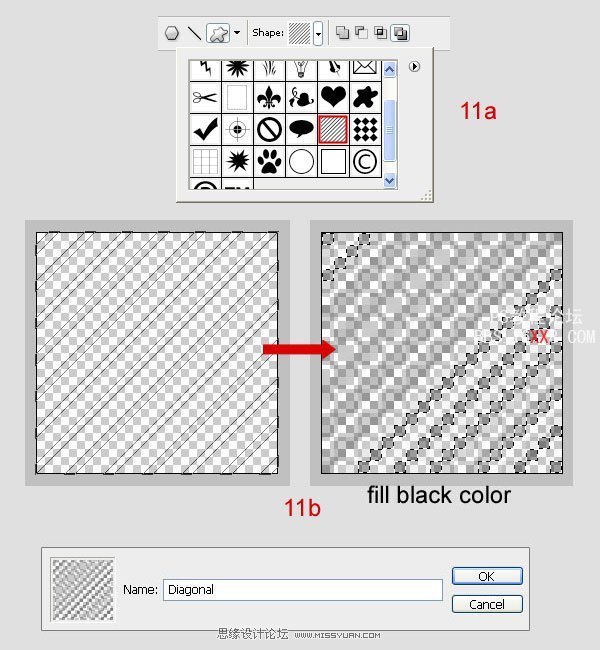
Step 11Create a new document (20 x 20px) with a transparent background. Choose the Custom Shape Tool, select the diagonal shape (11a). Draw and fill with black (11b). Then go to Edit > Define, name it “diagonal” and close this document (no need to save).
步骤11
创建一个(20 × 20px)透明背景的的新文件。选择自定义形状工具,选择图(11a)中显示的形状。绘制和填充黑色(11b)。然后进入“编辑>定义图案“,命名为“diagonal”,并关闭该文件(不需要保存)。
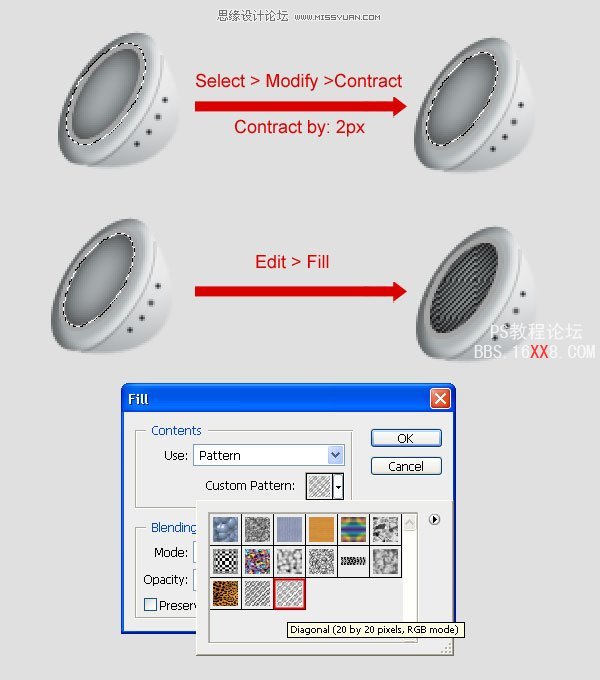
Step 12Come back to the main document. Create a new layer under “right 03”, and call it “right 06”. While holding “Command” down click on the layer “right 03” to obtain its selection. Go to Select > Modify > Contract, put Contract by 2px. Go to Edit > Fill, at Contents select Pattern, at Custom select “diagonal”.
步骤12
回到主文件。按住Ctrl,单击 “right 03”图层,得到选区,并建立新图层,命名为“right 06”。”选择>修改>收缩'’,输入2px。去”编辑>填充“选择填充图案,选择自定义的“diagonal”。
Step 13The left earpiece.
Create a new folder (outside “right earpiece” folder) between “ipod” folder and “background”, call it “left earpiece”. Do the same steps of “right earpiece”.
步骤13
左耳机。
创建一个新文件夹(在“right earpiece” 文件夹外,在“iPod”文件夹与“background”之间),命名为“left earpiece”。和上面的操作相同。


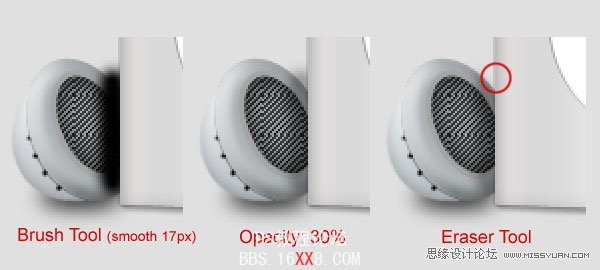
Step 14In the “left earpiece”, create a new layer on top, call it “shadow left” and according to the following images:
步骤14
在 “leftearpiece”图层上创建一个新层,称之为“shadow left”。如下所示
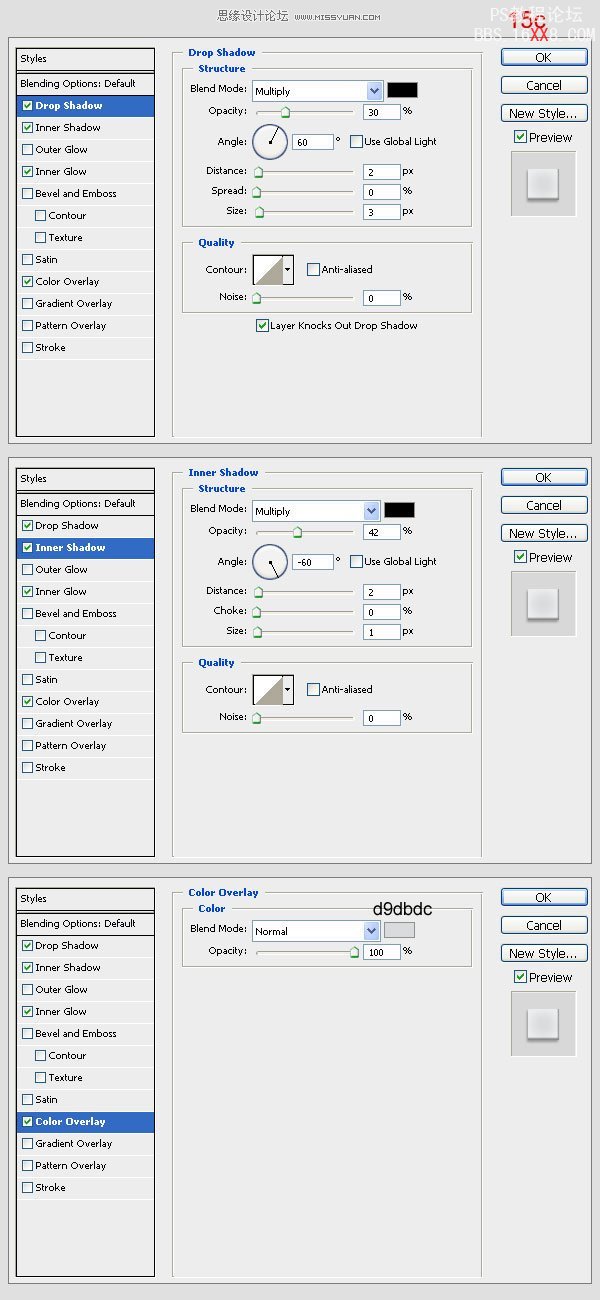
Step 15Create a new layer under “left earpiece” folder, call it “line”. Use Pen Tool to draw like 15a. First, set Brush tool is hard brush 4px, black color. Then press U, click right mouse on the image, select Stroke Path to draw black line (15b). Open Blending Options this layer and setting (15c).
步骤15
在“left earpiece”文件夹中建立新层,命名为“line”。使用钢笔工具绘制图15a所示图形。设置画笔工具(b)为4px,黑色。在图像上单击鼠标右键,选择描边路径(15b)。添加图层样式设置参见(15c)。
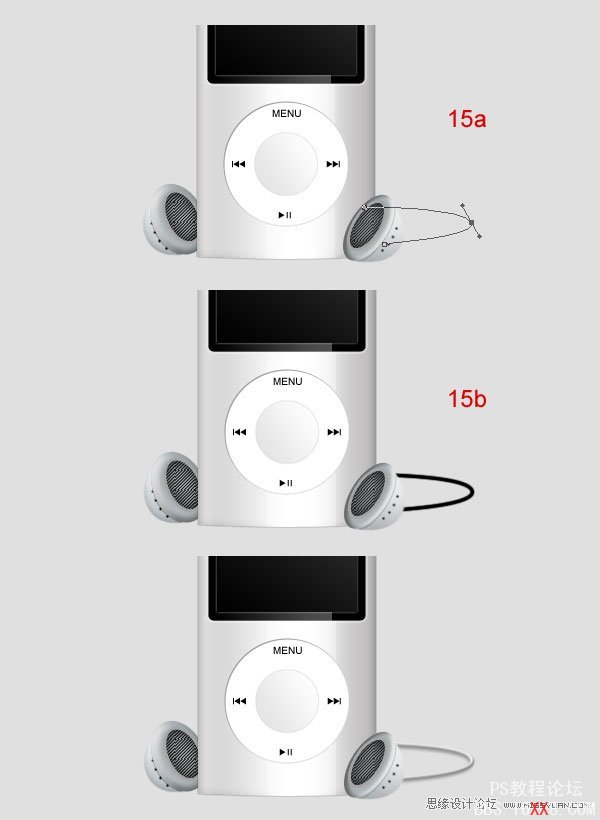
Step 16Press Command + J to duplicate “line”, rename new layer “line shadow”. Move it under “line” and reduce Opacity to 40%. Then move this layer down a little.
步骤16
按Ctrl + J复制 “line”,重命名为“line shadow”。使它在”line“层下,不透明度设置为40%。

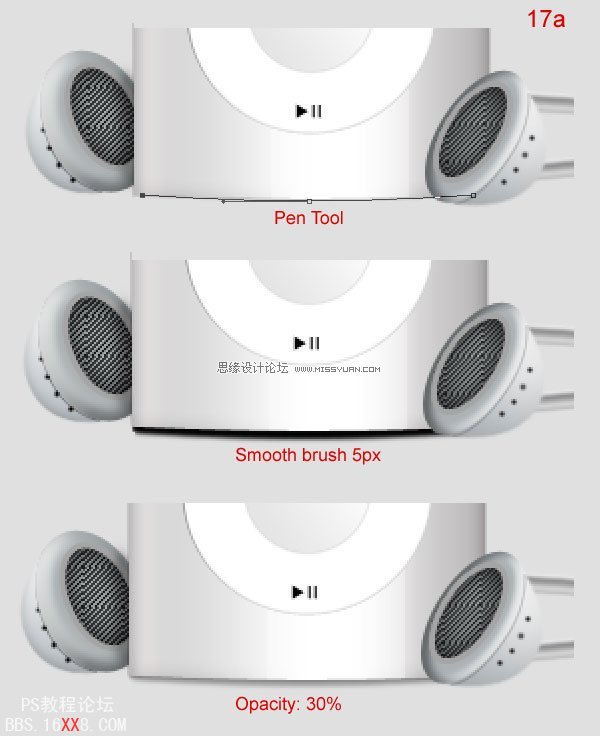
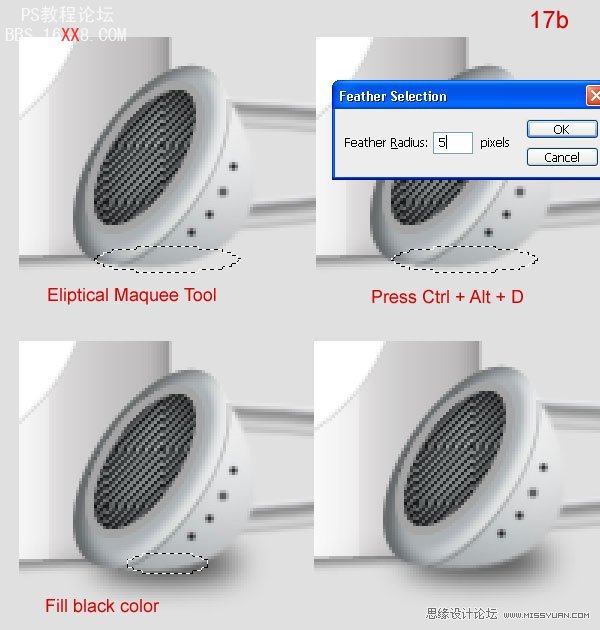
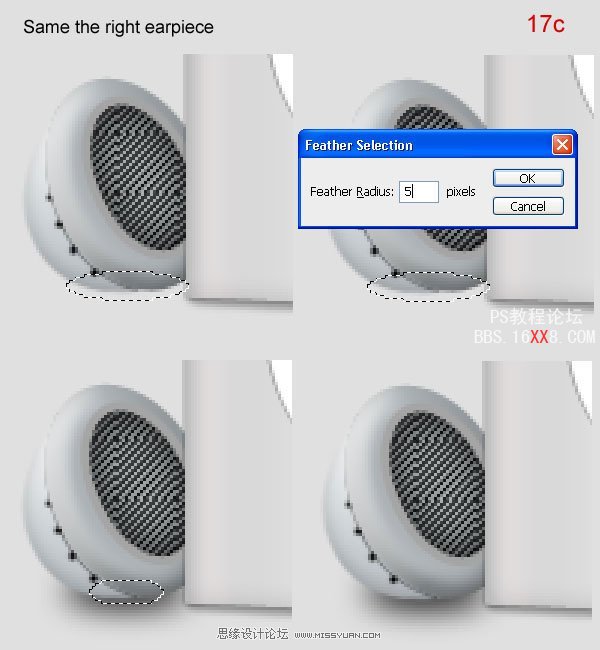
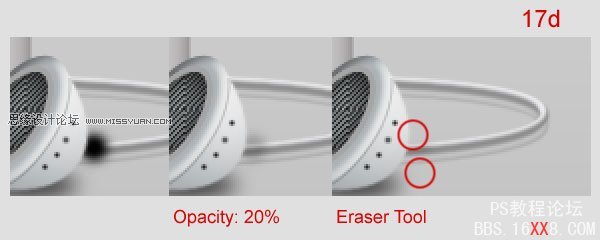
Step 17Create a new folder under “left earpiece” folder, call it “shadow”. Use Brush Tool, Pen Tool, and Elliptical Marquee Tool to draw accordin to the following images below:
步骤17
在建立“left earpiece” 文件夹下新建一个文件夹,命名为“shadow”。使用画笔工具(b),钢笔工具(p)和椭圆选框工具(m)绘制据下面的图形。
Final Image最终图像。
学习 · 提示
相关教程