Photoshop绘制好看的复古风格的蜡封(3)
来源:未知
作者:bbs.16xx8.com
学习:243人次
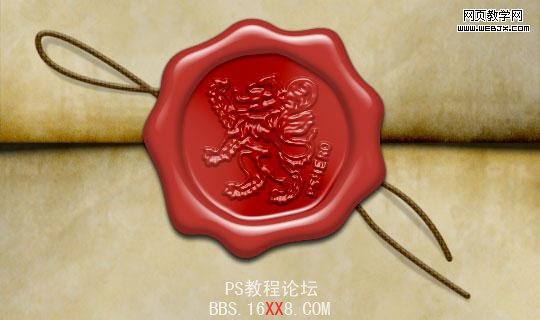
本Photoshop教程利用钢笔工具绘制一个蜡封的形状,然后使用图层样式设置蜡封的风格,然后添加一个图案进行合成最终效果如下。
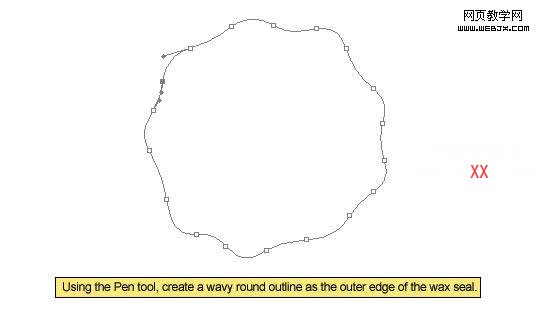
大小为540×320px分辨率 72ppi文档,然后使用钢笔工具绘制如下图形。
扩充路径。
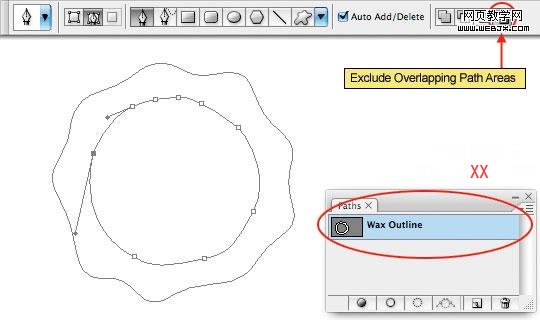
为外部的线设置一些锚点。

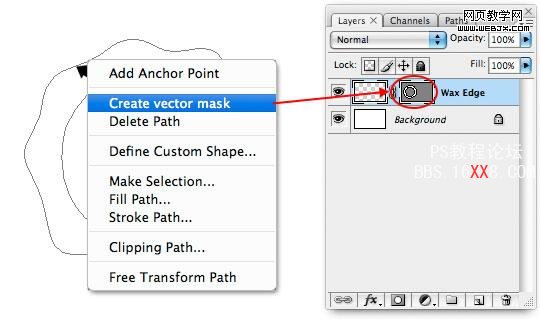
创建矢量蒙板图层。
填充颜色为#bb362e ,然后按DELETE删除。
复制图层
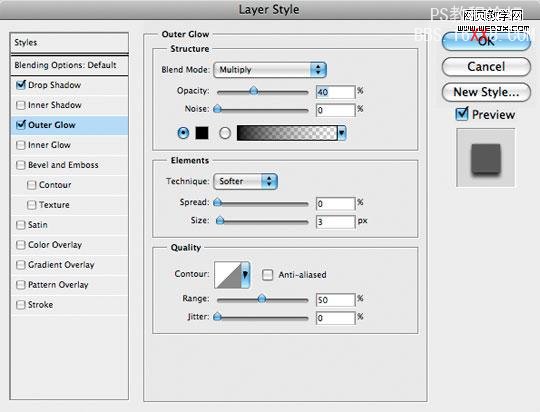
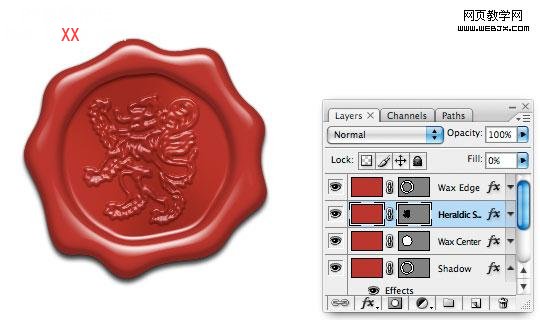
设置图层样式。
具有了蜡的一些特性了!

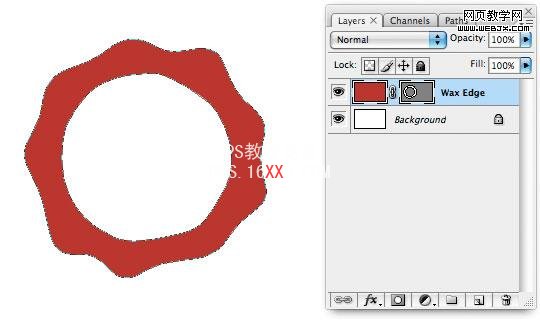
再复制图层
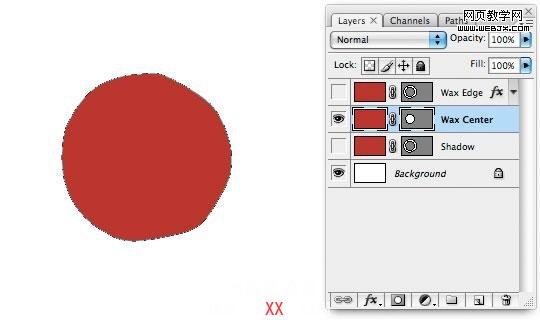
给中间图层填充颜色
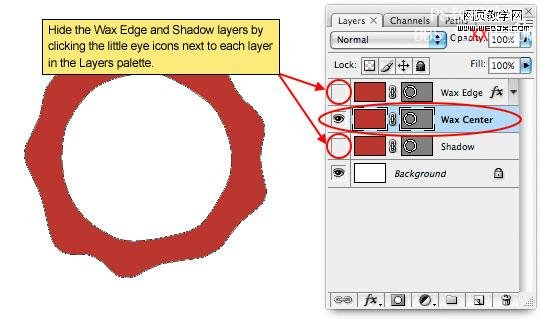
显示锚点
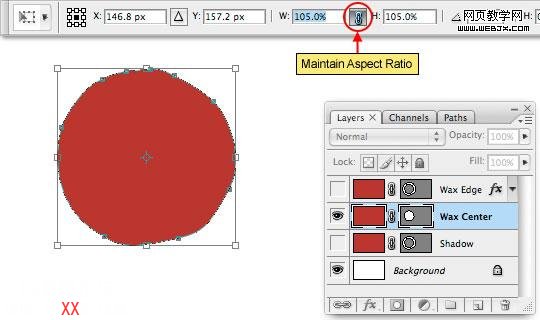
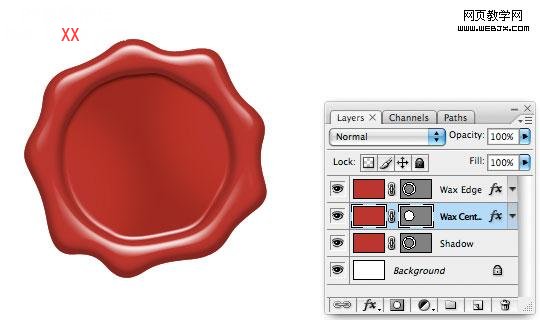
这时的效果。
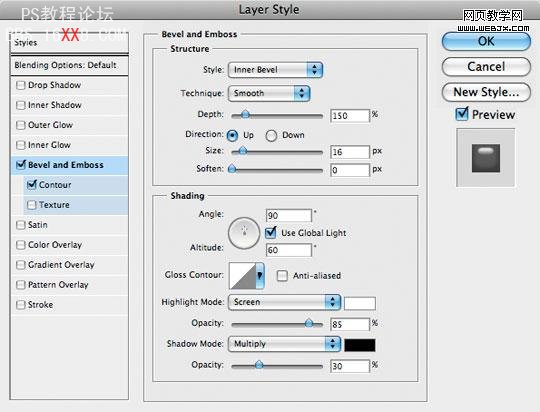
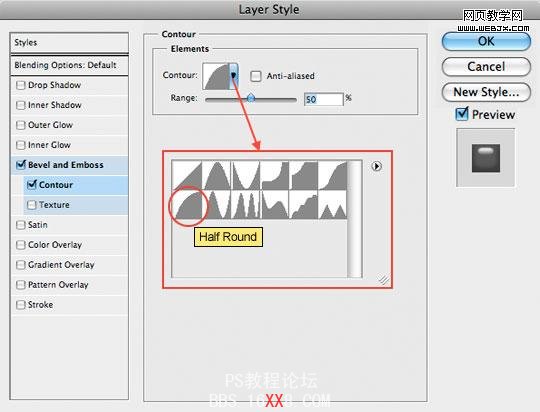
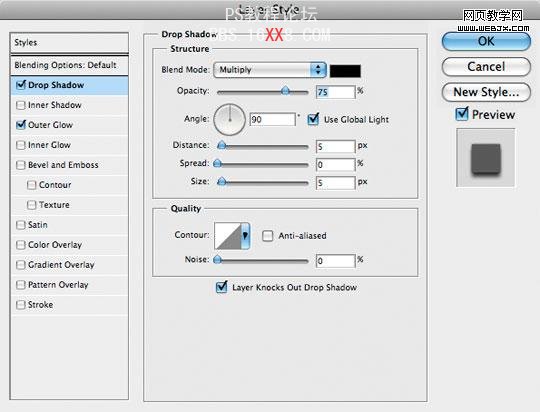
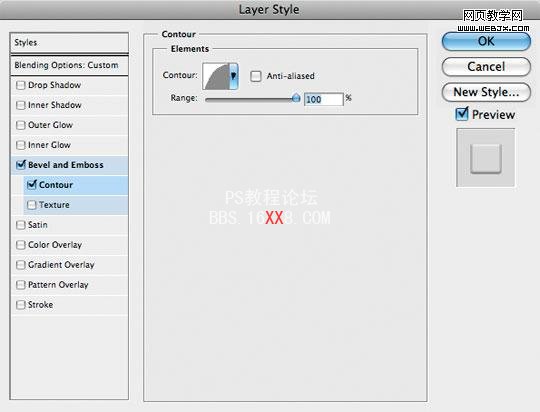
设置图层样式
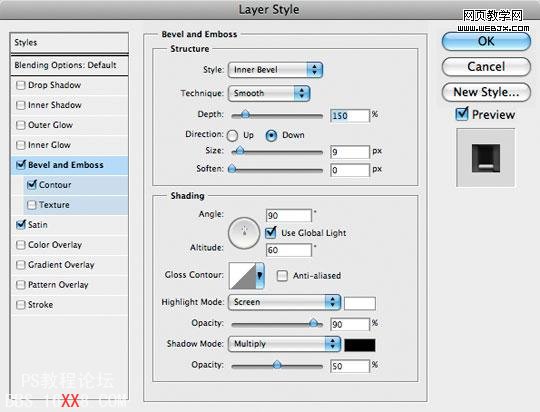
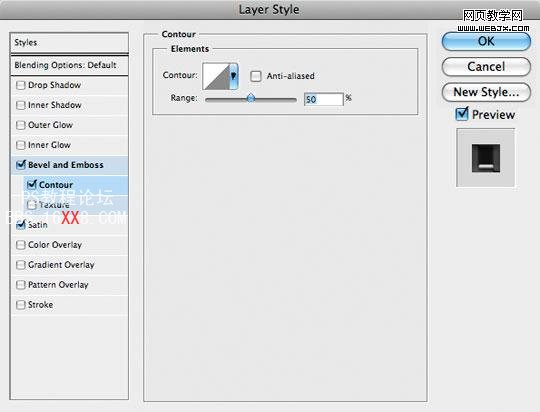
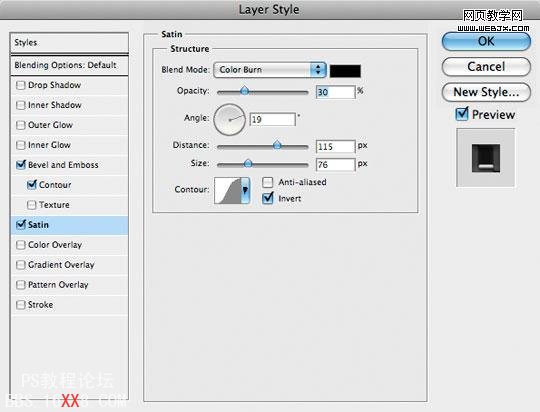
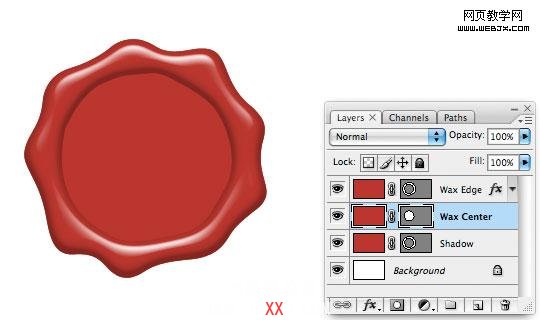
效果如下。
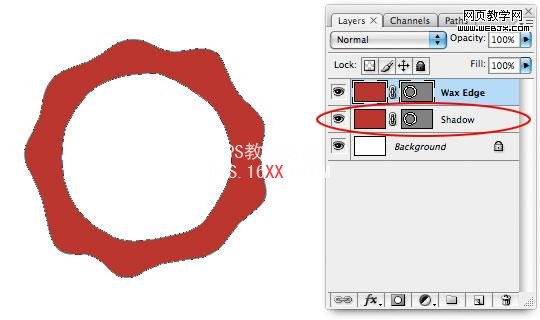
下面我们设置阴影。
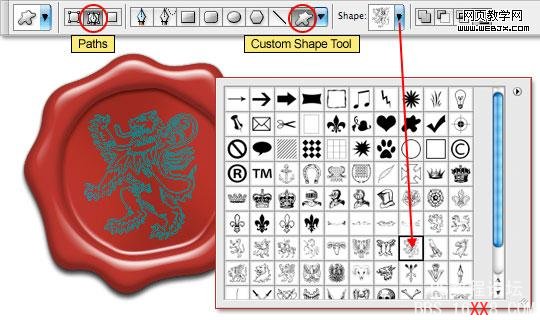
然后使用自定义形状工具。
调整填充为0

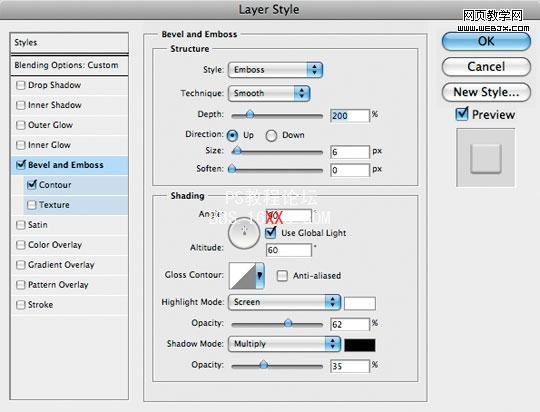
设置图层样式。
最终效果。
最后我们换一个背景和添加一条绳使之看起来更像蜡封了。


学习 · 提示
相关教程
关注大神微博加入>>


网友求助,请回答!