ps绘制逼真的油漆毛刷教程(5)
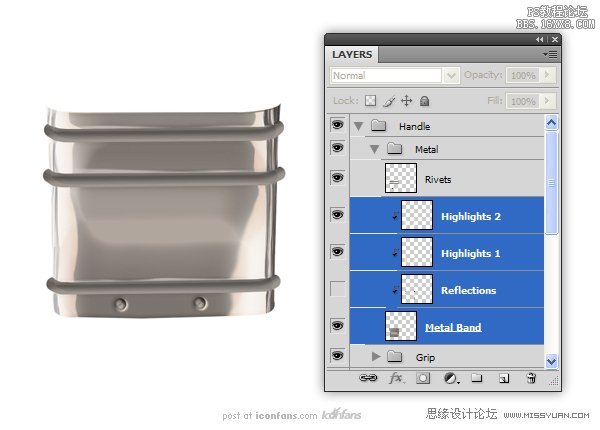
Step 29
Create another clipping layer called “Highlights 1.” Using a lightercolor, draw in some highlights as shown. Use the Burn Tool to give the colorsome variation and the Blur Tool to soften some of the highlights.
(建一个名为“Highlight 1.”的剪切层,用较淡的颜色,画一些亮点,如图所示。用“加深”工具使一些颜色变化,用“模糊”工具使一些亮点柔和。)

Step 30
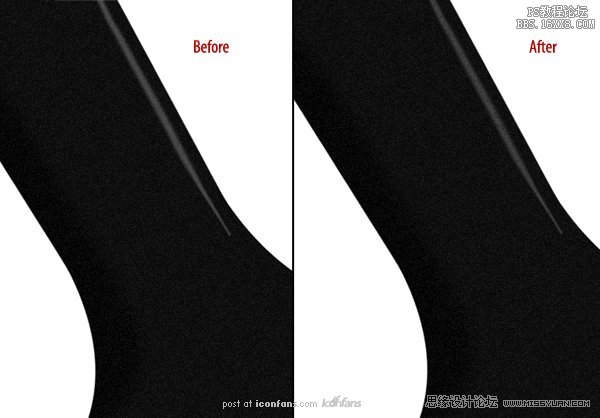
Create another clipping layer called “Highlights 2″ and using thesame techniques from the previous step, add some additional highlights.
(建一个名为“Highlight 2.”的剪切层,与之前的步骤一样,用同样的手法添加一些额外的亮点。)
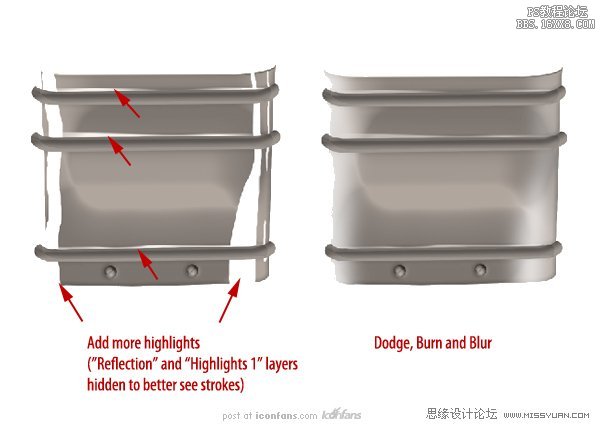
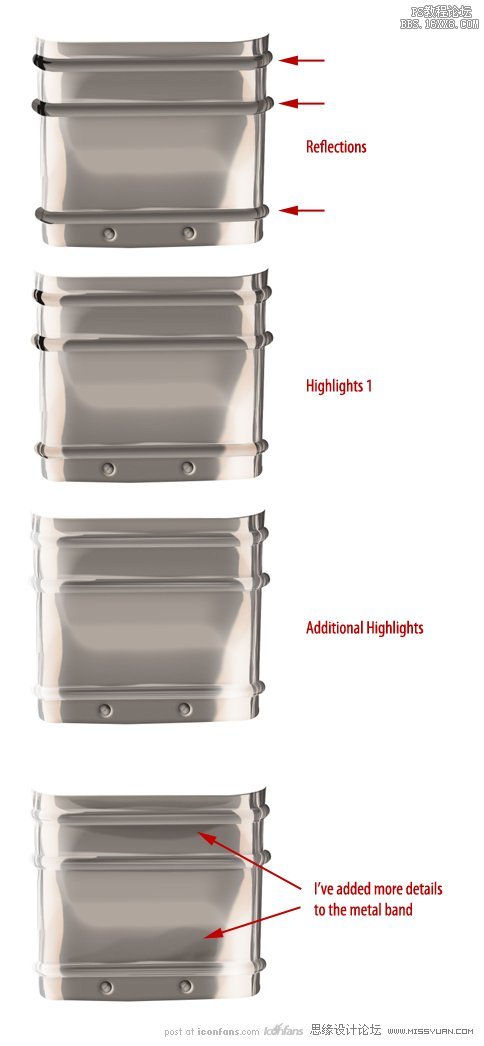
Your image should resemble the following
你的图像应该是类似下面如图所示.
Step 31
Now that we’ve added reflections and highlights as clipping layersto the “Metal Band” layer, we will use the same techniques to add reflectionsand highlights to the bevels. After this is done, add any additional details asyou see fit.
(现在我们已经添加了一些映像和亮点在“Metal Band”内的剪切层上 ,我们将用同样的方法在斜面“Bevels”上添加一些映像和亮点。这个做完以后,你可以增加一些你认为合适的额外细节。)
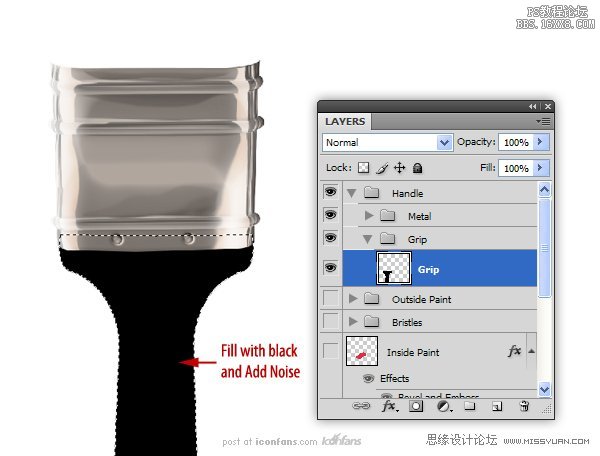
Step 32
Create a New Layer called “Grip” inside the previously created“Grip” group. Draw the shape of a brush handle and fill with black. Give thissome noise (Filter > Noise > Add Noise) with a setting of 10%.
(在之前我们创建的“Gip”组里新建一个名为“Gip”的图层。画一个刷柄的形状,并用黑色填满。給一些的杂色(濾鏡>添加雜色)設定为10%。
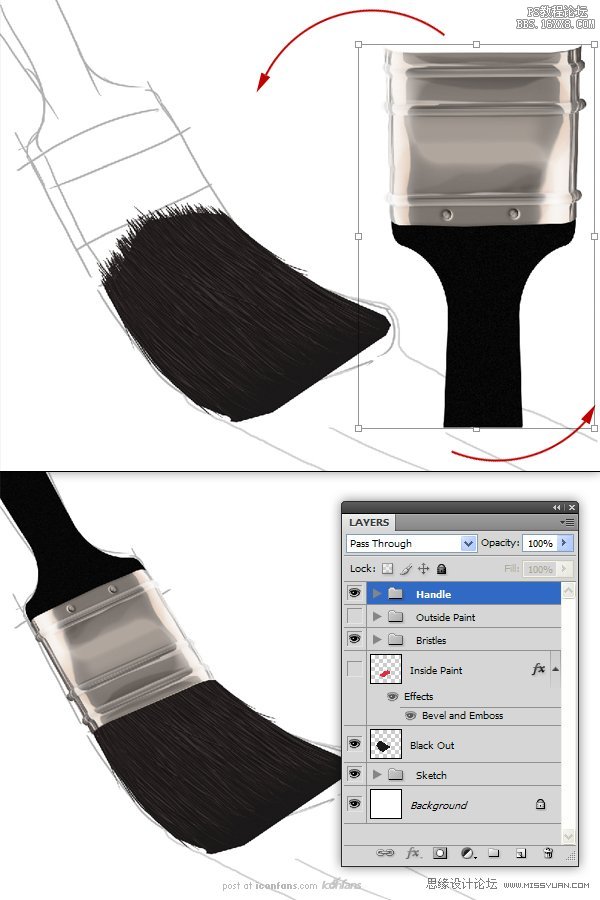
Step 33
Before we finish the grip, rotate and skew the “Handle” group in toposition in our scene. Unhide the “Sketch” and “Bristles” group to help withthe positioning.
在我们完成把手指前,旋转和倾斜组“Handle”到我们场景中相应的位置。将之前隐藏起来的“Sketch”和“Bristles”组,取消隐藏以便于定位。
Step 34
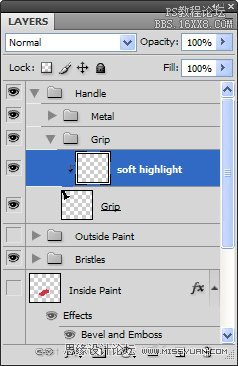
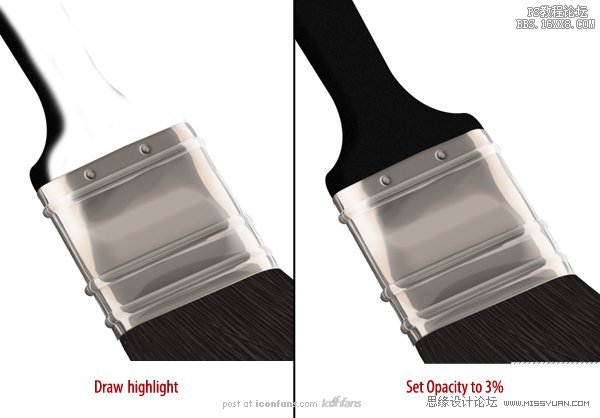
Now, we are going to start texturing the grip. We will do this witha series of clipping layers. Create a new clipping layer to the “Grip” layerand, using a soft brush, paint a portion of it white (see image below). Setthis layer’s opacity to 3%.
现在我们将开始把手的纹理结构,我们将用一系列的剪切图层来完成这个。新建一个剪切层到“Gip”组,用一个软刷,描绘出白色部分(如图)。设置这个图层的不透明度为3%。
Step 35
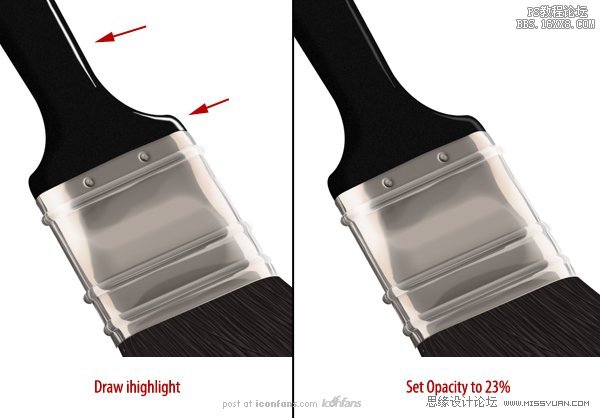
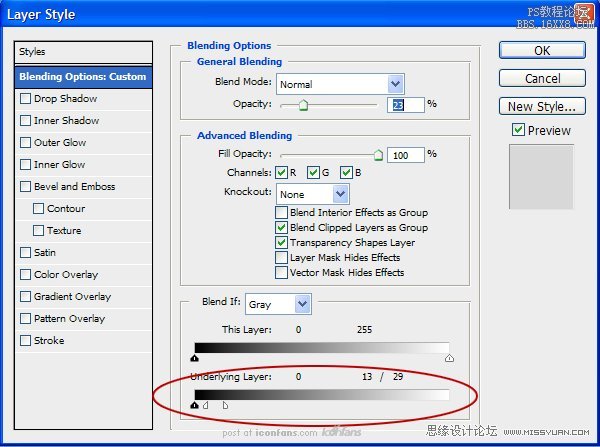
On a new clipping layer, draw a thinner highlight on the grip.Change the opacity to 23%. Open the Layer Styles and adjust the layer’s BlendIf sliders as shown (this will break up the highlight so it doesn’t appearunnaturally smooth).
在一个新的剪切层上,在把手上绘制一条薄的高光。将不透明度改为23%。打开图层样式,调节“混合颜色带“滑标如图所示。(这样可以打破高光,因此不会出现不自然的平滑)
学习 · 提示
相关教程