ps设计一个时尚MP3播放器教程(8)
Step 7171步
Set Opacity to 23% and Fill to 0%.设置不透明度为23%,填充为0%。
Add following layer styles.新增以下图层样式。


Step 7272步
Below, you can see the difference with and without reflection.下面,你可以看到和无反射的差异。

Step 7373步
Next we will add reflection on left and right window.下一步,我们将增加左,右窗口反映。
Copy left and right window path, set their mode to Add (1).左,右侧窗口中复制的路径,设置其模式,以添加(1)。
Click Adjustment layer icon and select Solid Color.点击图标,并调整图层选择纯色。
Subtract path with the main window path (2).减去路径与主窗口路径(2)。
Create new path covering top part of the interface and set it to Intersect (3).创建新的路径覆盖了界面顶部的一部分,将其设置为相交(3)。

Step 7474步
Set Opacity to 10% and Fill 0%.设置不透明度为10%和填充0%。


Step 7575步
Below, you can the difference with and without reflection.下面,你可以与不反射的差异。
Very subtle but it gives more depth onto the shape.非常微妙,但它提供了更多的形状上的深度。

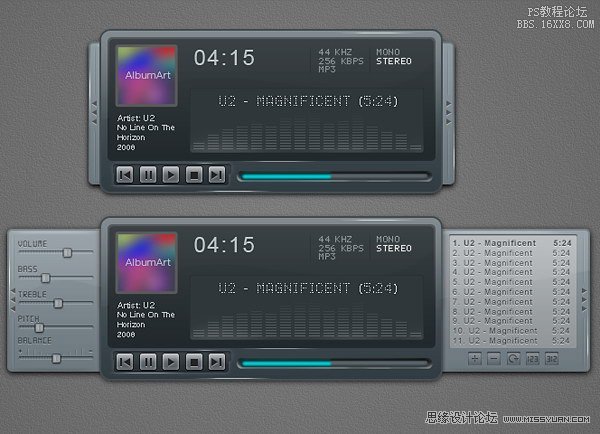
Step 76: Interface with Closed Playlist and Settings步骤76:接口与播放列表和设置封闭
Put all shapes and layer that create the mp3 player into a group folder.把所有的形状和层,创建成一个组文件夹的MP3播放器。
Duplicate the group and move the left and right window until they are closed.复制本集团及左,右移动窗口,直到它们被关闭。

Step 77: Sharpening步骤77:锐化
We have tried to sharpen every pixel on the interface, we still need to sharpen it again.我们试图增强界面上的每个像素,我们仍然需要再提升。
Create new layer on top of all layer.创建新层上的所有层。
Hit Command/Ctrl + Shift + Alt + E to merge all visible layers.点击命令/按Ctrl + Shift + Alt键+ E来合并所有可见图层。
Now, we have exact duplicate of the image in one single layer.现在,我们已经精确的图像重复一单层。

Step 7878步
Click Filter > Sharpen > Unsharp Mask.点击“滤镜>锐化”> USM锐化。
This filter will sharpen all the pixels on the layer.该过滤器将所有的层锐化的像素。

Final Image最终图像
学习 · 提示
相关教程