photoshop图标制作:时钟(3)
来源:未知
作者:空来风
学习:1288人次
Now click on "Inner Glow".继续图层样式的设置,现在是“内发光”,参数如图:
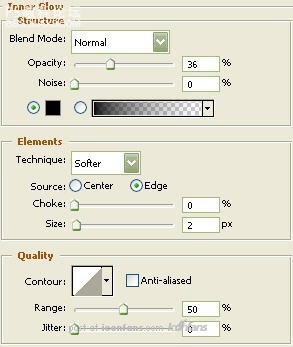
Step19 步骤19
Now click on "Satin".现在点击“光泽”来继续设置,如图:
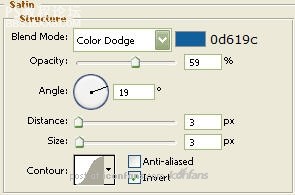
, Step20 步骤20
Now click on "Gradient Overlay".设置“渐变叠加”,如图:
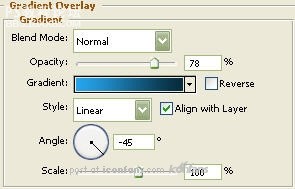
Step21 步骤21 渐变叠加各色标的色值和位置如下图:

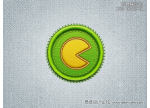
Step22 步骤22
You should now have the below image.
现在,我们会得到下图所示效果啦

Step23 步骤23
Asyou can see, I have two bells and they are angled. To angle the "Bell"layer, go to the main menu and choose "Edit" then "Free Transform".While holding in the "Shift" key on your keyboard, rotate the "Bell"layer till it reaches -30 degrees in the options palette.
正如你所见,我们的时钟通常都有两个“铃”的,并且是都有所倾斜的在时钟顶部。那么,我们现在回到“铃”那个图层,从主菜单上选择“编辑”--“自由变换”(其实这里CTRL+T就可以)。然后呢,按住Shift键旋转这个层,直到你看到面板上(就是最顶部那一行的),显示角度为“-30度”。
Duplicate the "Bell" layer then go to the main menu and select "Edit" then "Transform" and lastly "Flip Horizontally".
复制“铃”这个图层,CTRL+T,单击右键,选择“水平翻转”。(这里我没有按照原文翻译,因为觉得快捷键来得更省事一些)
Move to it's appropriate spot and place beneath the "Grey Circle" layer in the layer palette.
将水平翻转过后的“铃”和之前的“铃”移动到合适的位置,当然,这两个层需要在“灰色正圆”的图层之下哦~

Step24 步骤24
Thenselect the "Elipse Tool". Draw a circle as illustrated using 3f84e2 asthe color. Name this layer "Clock Legs". Place beneath the "GreyCircle" layer in the layer palette.
选择“椭圆工具”,画一个比较扁一些的椭圆,颜色使用色值为“3f84e2",将这个图层命名为“时钟腿”,这个图层是要放在“灰色正圆图层”下面的哦~
Nextwe will need to move the bottom anchor point of the "Clock Legs" layer.To do this select the "Direct Selection Tool" and select the bottomanchor point as I have done below. Now, using the up arrow key and"Shift" key on your keyboard, move that anchor point up three times asillustrated below. Then move the outside anchor points in once whileholding in the "Shift" key as well.
学习 · 提示
相关教程
关注大神微博加入>>


网友求助,请回答!