photoshop图标制作:时钟(4)
来源:未知
作者:空来风
学习:1288人次
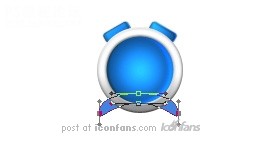
下面我们需要调整这个“时钟腿”的锚点,使最初的椭圆形状变为时钟腿的模样。
Step25
步骤25
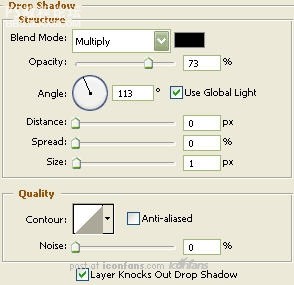
Now right click the "Clock Legs" layer and select, "Blending Options...". Now click on "Drop Shadow".
现在来对“时钟腿”设置图层样式,先设置“投影”,参数如图。
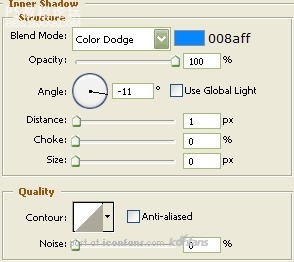
Step26 步骤26
Now click on "Inner Shadow".现在点击“内阴影”进行设置,参数如图:
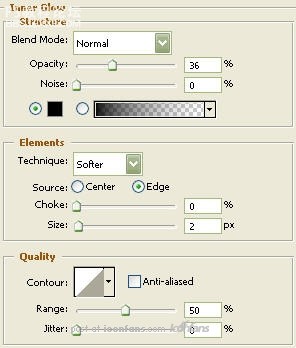
Step27 步骤27
Now click on "Inner Glow".点击“内发光”,参数如图:
Step28 步骤28
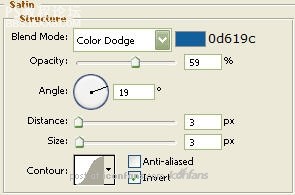
Now click on "Satin".现在设置“光泽”,参数如图:
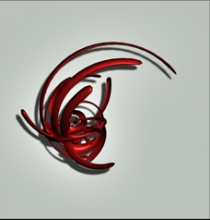
, Step29 步骤29
You should now have the below image.做完以上设置以后,你应该就能得到下图所示效果了^_^

Step30 步骤30
Nowselect the "Pen Tool" and draw the hands of the clock. For thoseunfamiliar with the "Pen Tool" you may download the custom shape herethat I made for you. For those of you who are taking the time creatingthem yourself, when satisfied, merge the hands together so the handsare on one layer.
现在使用“钢笔工具”把时钟的表针画出来,对于不太熟悉钢笔工具的人,我准备了“表针形状”可供下载使用。http://www.empiredezign.com/vers ... romempiredezign.csh"target="_blank" “点击这里”下载表针形状
Then give it a "Drop Shadow" byright clicking the merged clock peices layer and selecting, "BlendingOptions...". Now click on "Drop Shadow". Settings for that are: Angle:113 Distance:1 Size: 2
做完表针以后,记得把表针放到时钟的中心位置,然后加上一个图层样式“投影”,参数为:角度:113,距离:1,大小:2

Step31 步骤31
Then select the "Elipse Tool". Draw a circle as illustrated using Black as the color. Name this layer "Shadow".
现在选择“椭圆工具”,用黑色画一个扁扁的椭圆,命名这个图层为“时钟投影”
Place beneath the "Clock Legs" layer in the layer palette.
把这个层放到所有图层的下面。(它可是时钟的投影耶,大家画的时候注意大小哦)

Step32 步骤32
Now right click the "Clock Legs" layer and select, "Blending Options...".现在双击“时钟腿”图层设置图层样式,如图:
学习 · 提示
相关教程
关注大神微博加入>>


网友求助,请回答!